One of the fastest ways to get amazing looking images is by using Blending modes. Each blending mode changes the way that a layer reacts with the layer underneath it. You get a small inkling of this by adjusting the opacity of a layer. Using blending modes opens up an entirely new world. These are like sunglasses for your layers that can become x-ray specs and a whole lot more. There is a scientific explanation of each blending mode in the help menu of Photoshop. Don’t get too caught up in the definitions. What matters is how it looks and the best way to determine this is to experiment.
Blending modes are not just present in Layers. You can also find them with the painting tools, the layer styles, smart filters and other places in Photoshop.
Because the blending modes will work the same no matter how you use them, I’ll use layers to explain the blending modes. Layer blending modes also happen to be the most commonly used form of blending mode.
Tip: Trying on Blending modes quickly.
Do you ever get tired of constantly clicking the blend mode drop down to try different blending modes? Here’s a tip that will make it easy to see what all the blending modes look like on your layer. Choose the move tool. Hold down shift and the plus key to cycle through all the blending modes one at a time. Choose Shift and the minus key to cycle backwards. (If a brush or gradient tool is selected the same shortcuts will cycle through the paint blending modes)
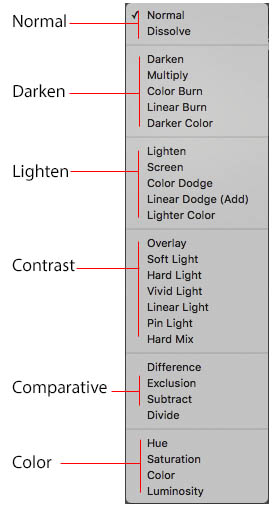
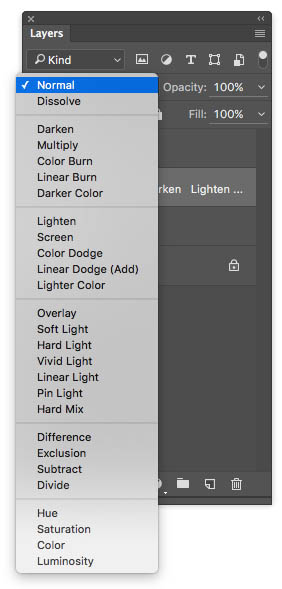
The Blending Modes are separated into six groups
- Normal: No special blending takes place, only opacity effects these
- Darken: The result darkens the image. White is invisible on the Blend layer.
- Lighten: The result lightens the image. Black is invisible on the Blend Layer.
- Contrast: Increases Contrast. 50% gray is invisible on the blend layer.
- Comparative: Difference between images is apparent
- Color: Works on different color qualities
Using Blending modes
To use a Layer Blending mode, you need to have a document with at least two layers present. At the top of the Layers palette, you’ll see an option that says Normal. Click the drop-down menu to see all the available modes. Select one of the modes to see the result in your document window.
I’m going to let you jump right into some practical uses of blending modes. If you would like to see a list of all the modes and an explanation and example of each, go to the end of this tutorial, it’s all here!
How to Use Blend Modes in the Real World
The ways to use the different blending modes are limited only by your imagination and creativity. There are a few techniques presented on these pages that make use of some of the blending modes. The real key? Experiment. The more you experiment and become comfortable with the different Blending modes, the better your images will look.
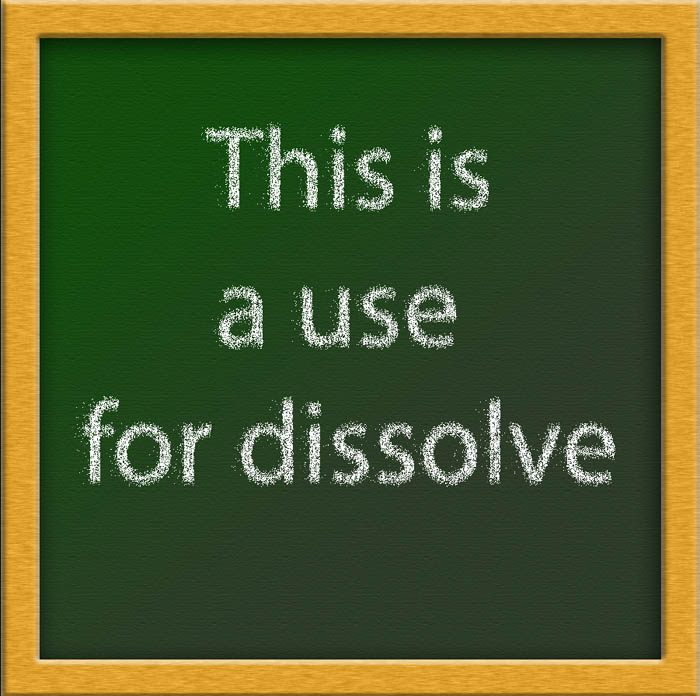
Dissolve
The dissolve blending mode is great for special effects. The dissolve especially lends itself to particle effects such as star fields and flying sparks. By adjusting the opacity you can control how the dissolve displays. Another way to control the dissolve pixels is to use blur filters. The spots will appear wherever there is a soft or semi transparent edge. In this case, transparency and blurs were used to get the chalk effect.
Hiding black or white.
Knowing that the darken and lighten blending groups hide white and black is useful information when it comes to placing things over a background. It’s not always necessary to mask out the background colors on the top layers. If these layers contain a black or white background, the blending modes can hide these colors and make compositing a snap.
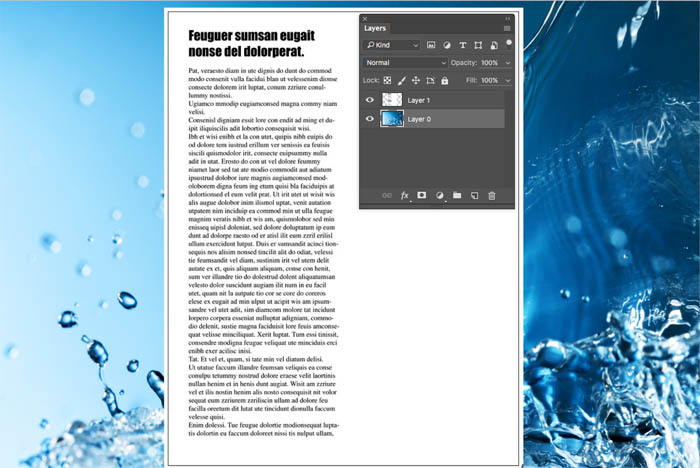
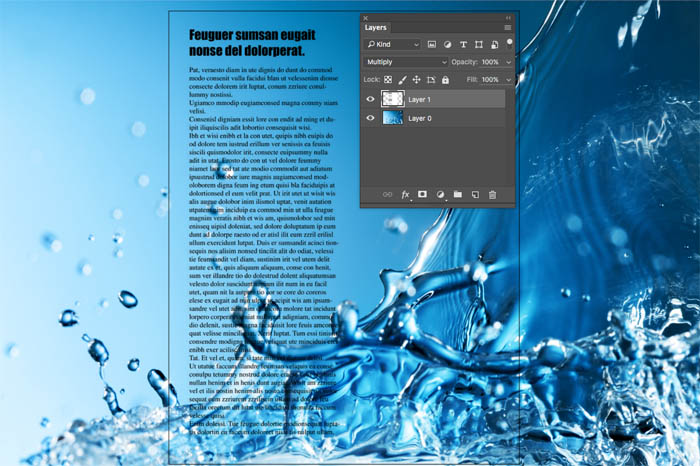
1. In this example, there is a canned page in top of an image. Just the text should be showing through and the white needs to be removed. You could reach for the masking tools such as the magic wand or color range. This is completely unneeded.
2. Change the blending mode to multiply. The white is now hidden and the black text reads perfectly.
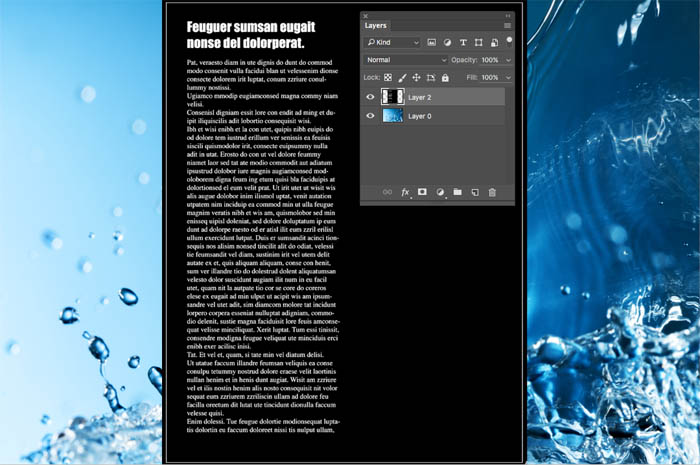
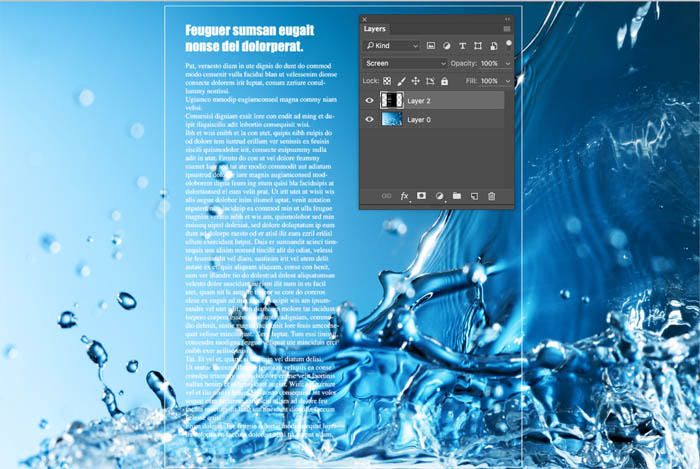
1. This means then, if you have the opposite of a previous example; white text reversed out onto a black background you have a strategy.
2. Change the blending mode to Screen and all the black disappears leaving the white text against the background image.
Quickly Blending photographs Together
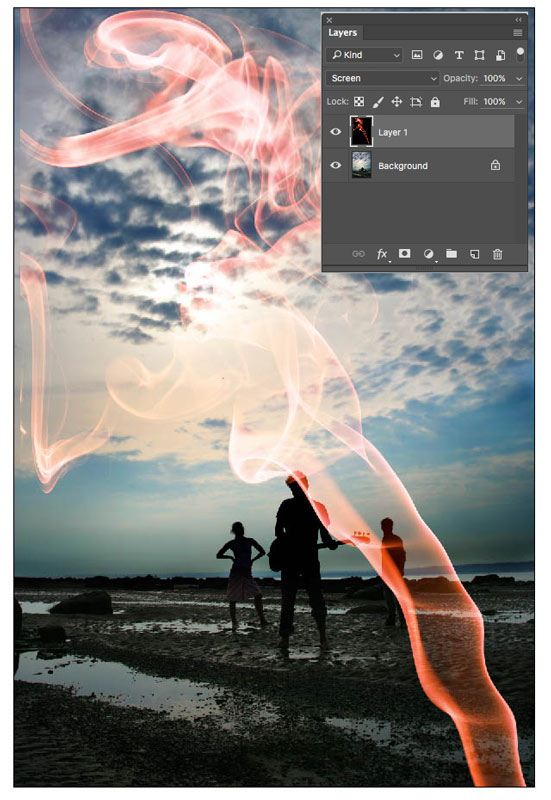
1. A particular blending mode works really well on more difficult subjects like glass, smoke, fire and lightning. Take these images for example. How would you put the smoke on top of the image of the musicians? A real mess could be made of this and it could become very difficult and time consuming.
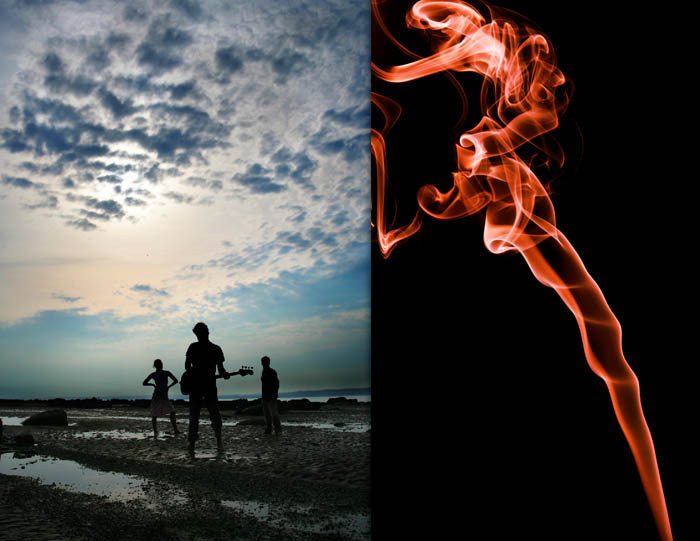
2. Aren’t you glad your reading this tutorial? All you need to do is choose screen blending mode and its perfect and quick
Making anything look better, especially people
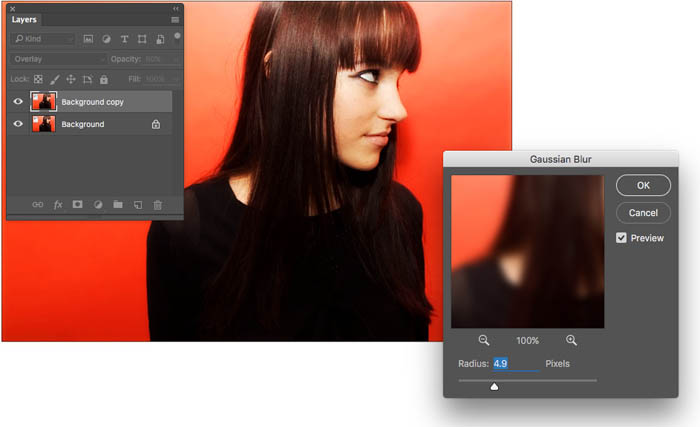
This next blending mode (Overlay) is guaranteed to make almost any image look better. Rather than just apply the Blending mode, you can add a couple of little tweaks that will make it a bit more subtle. You can just apply the blending mode for a nice finish, but try the variations.
1. Start with your photograph. 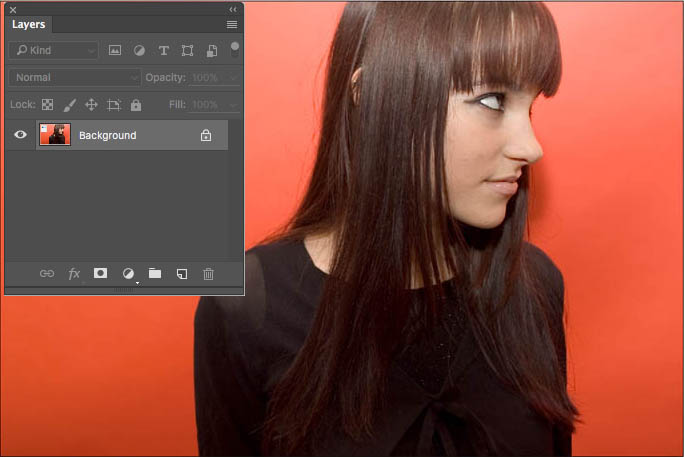
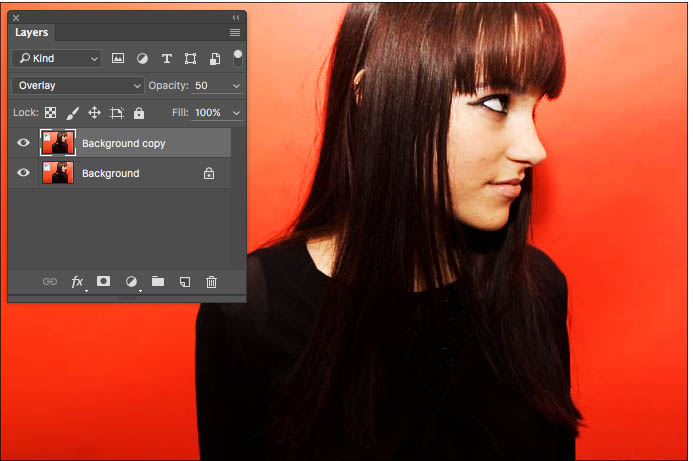
2. Duplicate the layer and change the blending mode at the top of the layers palette to overlay. Notice a huge difference in the colors and contrast right away.
3. Drop the opacity to a more natural amount if you want a less pronounced effect. Typically anything for 20-50 will work well depending on the image.
4. For some added punch and to produce a soft glow choose Filter>Blur>Gaussian blur. Choose the amount that looks good on your image. You will notice that there is a sweet spot on the slider. Go too far or not far enough and the effect doesn’t work, when your in the sweet spot there is a healthy glow around the image. This is a great way to make people look better and to smoothen out skin. Compare the results to this end image to the beginning image. It doesn’t take much to make an improvement with blending modes.
Texture and color effects
You can get some really interesting and powerful effects so easily by using blending modes. It’s always a good idea to cycle through a few different modes and see what results you come up with. You may be surprised. It’s the Blending modes that separate the pros work from the novices. Now you will look like a pro too (unless your already a pro, then you’ll look even better).
1. Take the two images of the fire and the sinister looking man. What do you think will happen with blending modes here?